Tuesday, November 29, 2011

Rose's Southern (Manhattan) Coconut Cake

DSC_9277_530x800
                          Dreamy, pretty, romantic-looking Southern Coconut Cake was moist and delicious.

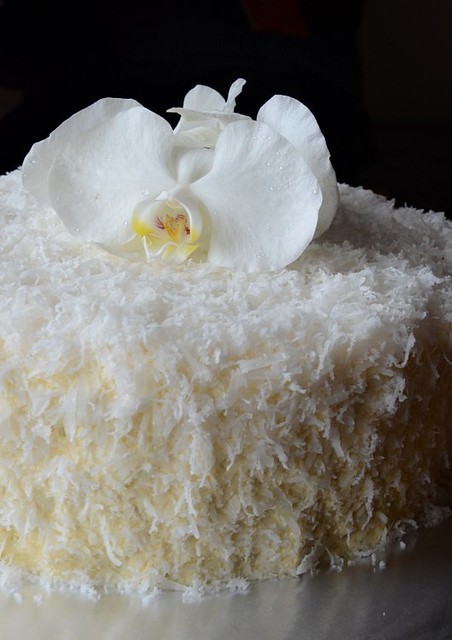
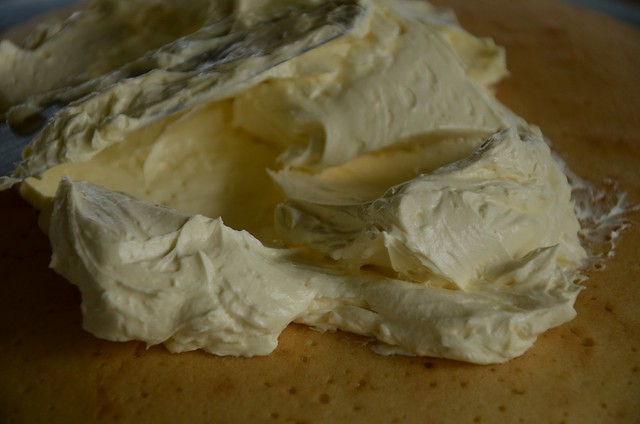
For years I've wanted to make the Southern Coconut Cake and last weekend I had a good reason to make one because it was a friend's wedding anniversary. I have tested several coconut cake recipes including those from Saveur but they weren't what I was looking for, especially those made with the traditional 7-minute frosting. I so believe in Rose Levy Beranbaum's recipes that I not only made a whole recipe of her coconut cake, I even made her Silky Meringue butter cream which is so laborious that only someone as dogged as me will put herself through it, a buttercream made up of three recipes: a creme anglaise, an Italian meringue cream and the blending of both creams with butter. Was the effort worth it? You bet, because the frosting lived up to its name and was the silkiest, lightest buttercream I've ever eaten. The cake was a huge hit at the party. It's the best coconut cake I've tasted so far and again, I wonder why, with coconuts being a tropical fruit, coconut cakes are non-existent here.

Making the cake batter was unusual, something I've never done before, but the resulting cake was beautiful in texture. Butter, sugar, salt and flour are whisked together first and then the butter is whisked in, followed by the unwhipped egg whites and coconut milk mixture. Only egg whites are used in the cake batter, which is why the cake is very light yellow. The yolks are used to make the creme anglaise. As usual, I reduced the amount of sugar by nearly half. Sugar adds moisture to cakes and taking away too much of it will affect the taste and texture of the cake but I can sacrifice a bit of moistness in the cake for my kidneys and arteries. I also reduced the salt by more than half and it didn't do harm to the taste of the cake because I think the reduced saltiness was balanced by the reduced sweetness. I think that it's quite redundant to add a lot of sugar to balance a lot of salt in a cake. Cakes really are quite unhealthy and this coconut cake is not an exception although the buttercream is made a lesser evil by reducing the butter and bulking up with meringue.

I've given the recipe for the cake, adapted for my taste, but I think other than copyright considerations for the Silk Meringue, the 3-page recipe is just too much for me to type. You'll have to get Rose Levy Beranbaum's heavenly cake cookbook, Heavenly Cakes, for that or Google for it.

DSC_9237_530x800

DSC_9244_1208x800

DSC_9245_1208x800

DSC_9252_1208x800

DSC_9312_1208x800
    A friend described the cake texture as "between a sponge cake and a buttercake". If you are tired of airy spongecakes, you'll love this cake.
DSC_9300_530x800

Rose's Southern (Manhattan) Coconut Cake (adapted)
6 large egg whites, room temp
1 1/3 cups canned (10.6 fl oz) coconut milk
1 1/2 tsp vanilla extract
1 tsp coconut extract
400 gm cake flour, sifted
270 gm superfine sugar (I hand-blended caster sugar)
5 tsp baking powder
1/3 tsp salt
227 gm (2 sticks/1 block) unsalted butter (firm but not hard is best)

Frosting: meringue buttercream

1. Oven preheated at 175 C. Prepare two 9 by 2 " round pans by lining with baking paper, then greasing them and lightly flour them.
2. Use a hand whisk to whisk the egg whites, 1/3 cup of the coconut milk, vanilla and coconut extract until just combined.
3. In the bowl of a standmixer, mix the flour, sugar, baking powder and salt at low speed for a couple of seconds.
4. Add the butter and remaining coconut milk. Mix on low speed until the dry ingredients are moistened, then increase speed top medium and beat 1 1/2 minutes. Scrape down sides of bowl.
5. With the mixer at medium speed, gradually add the egg white mixture in 3 parts, beating at medium speed for 20 seconds after each addition.
6. Divide the batter evenly between the two pans and bake 30 to 40 minutes or until a wire tester inserted in the center of the cake comes out clean or the cake springs back when pressed lightly in the center.
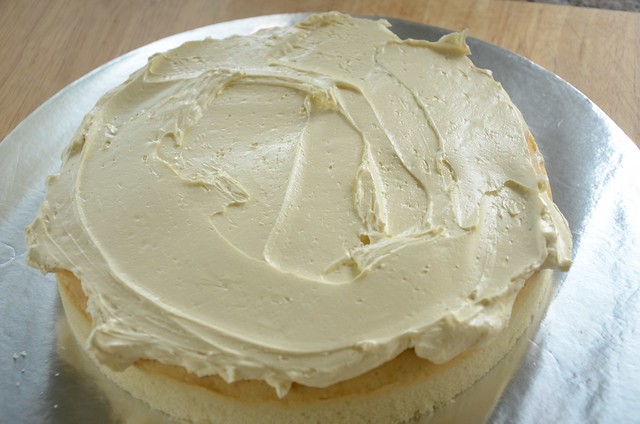
7. Cool the cakes and ice with your favorite meringue buttercream to which about 2 cups of fresh grated coconut is added (I preferred not to). Use a mixture of dessicated sweetened coconut flakes and freshly grated coconut to cover the whole cake. Chill if not serving immediately and take out from fridge 1 hour before serving.

This cake is best served at room temperature.

Thursday, November 24, 2011

Kim Chi Veg & Beef Soup

DSC_9115_1208x800

I'm sorry for the quality of these photos. I don't know how to take night photos yet don't like the harshness of the flash, and I didn't want to turn dinner into a photo shoot session.

I hardly watch TV. It's not that I don't have time. I just can't sit still in front of the box for long although I've done marathon sessions on the couch until 3 am for consecutive days watching Korean and Chinese TV series. Once in a while I'd catch some interesting program, standing up. The other day, I was walking by the TV room and the dish on a Taiwanese cooking program was sour cabbage soup with thinly-sliced sirloin. Since sour cabbage is not a common ingredient here, I thought kim chi would be a good substitute so last night this was what I cooked:

DSC_9070_1024x678
1. Put a cup of sliced kim chi into a claypot or glass/ceramic pot. Add enough chicken stock (or water + 1 chicken stock cube) to cover.

DSC_9072_1024x678
2. Add sliced Chinese napa cabbage, cover and boil about 10 minutes or until cabbage is nearly the texture you like.

 DSC_9074_1024x678
3. Add two sliced potatoes. Cover and boil 5 minutes.

 DSC_9075_1024x678
4. Meanwhile, sear 1/2 kg thinly sliced (these weren't thin enough) sirloin on both sides quickly. Sear the beef in several batches, each time using about 1 tsp butter. Do not cook through. Remove onto plate.

 DSC_9076_1024x678
5. Add about 2 cups soft or semi-soft tofu to the soup, scattering them over the soup evenly.

 DSC_9077_1024x678
6. When the tofu begins to boil, add 1 cup of chopped chives (these were from my garden. Chives are perennial so do grow some at home), spread them over evenly and cover. Taste and season with salt and white pepper.

 DSC_9081_1024x678
7. When the soup boils, switch off the heat and add the seared beef. Serve the whole pot at the table.

DSC_9094_1024x678
8. Drizzle some chili oil on the soup and eat with plain boiled rice and another dish, such as a fried fish dish.

Wey pronounced the soup perfect and motherhood was worthwhile again.

Btw, Wey said MasterChef Malaysia is an awful and embarrassing show. Any thoughts, anyone who has seen it because I haven't. I watched Hell's Kitchen for the first time last week and I enjoyed it and was happy that Paul, the underdog, won. To be honest, I avoid reality food shows because they are so...staged. I've only watched MasterChef Australia once, the finals between Callum and Adam, and I only watched it because my friend Elaine kept calling me when the show about to start so we sort of watched it together in our own houses but with our handphones to our ears. Guess who got all the answers right? Wey. He named all the fruits and sauces (except for Romesco sauce, if I remember right) and he didn't even have to taste them!

Tuesday, November 22, 2011

Pork & Kim Chi Stir-Fry

DSC_9030_509x768
Were you caught in the flood last Saturday? I was. I drove out to pick my son from tuition at 6:00 pm and was surrounded by water on the Jabatan Air road. Although I was driving an SUV, the stretch of flooded road in front was long so I drove into the Jabatan Air compound, with a small car following behind me. One by one, another 5 cars came into the compound too. We all sat in our cars waiting for the wind and rain to calm down. By 7:15 pm, I was totally bored and going insane sitting in my car so I drove through the water and onto the short stretch of road to get back to the main road. After picking Wey up, we got back to the Lido area and it was totally jammed. Jalan Penampang from Lido up towards KK was flooded. Lido Market was flooded. Houses were flooded and the access road to my housing area was flooded too.

Anyway, that was one of the worst floods in the last 20 years or so.
.
I had let Vero off early because we were going to my MIL's house for dinner but since the roads were flooded and restaurants nearby were all closed, I had to cook dinner quick because it was about 8:30 pm. I found a bottle of kim chi made by my friend Flora and some belly pork in the fridge and just made a quick stir fry of them. Surprisingly, Wey loved the pork and kim chi stir-fry even though he dislikes spicy dishes. He asked for the same thing the next day and then the day after.

This is my fourth plate of belly pork and kim chi stir fry. Wey said it isn't my best because 1) the pork was fried too long, making it hard and dry 2) there's sugar in the dish. Guilty as charged, I have to admit. I had rendered most of the oil out because I was concerned for the fat boy ("But the point is I like the fat!" he said) and I had added sugar because the store-bought kim chi was extremely sour. Wey is my Gordon Ramsey, telling me exactly what he thinks of my food and the thing is, he's right nearly everytime.

I'm sure there are many ways to stir-fry pork and kim chi but this recipe is the fastest (takes 15 minutes only to prepare and cook) and you need just two basic ingredients. Sometimes the simplest dishes are the best, especially in emergencies.

DSC_8997_1024x678
The amount of belly pork to kim chi is up to you. The pork must be quite fatty.

DSC_8998_1024x678
You can add some oil to the pan but I prefer not to.

DSC_9003_1024x678
This is overdone. Fry the pork until just done.

DSC_9010_1024x678
Add the kim chi and fry at medium low heat so that the kim chi flavor gets onto the pork.

DSC_9012_1024x678
Add the scallions and drizzle some sesame oil over.

DSC_9025_1024x678

Pork & Kim Chi Stir-Fry
1 cup thinly-sliced skinless pork belly
3/4 to 1 cup kim chi, cut same size as the pork
1/4 cup scallions, cut into short lengths
sesame oil

1. Arrange the pork single-layer on a non-stick pan and turn on the heat to medium high. Turn over when half done and fry both sides until lightly golden and just cooked. Do not overcook or the belly pork will be tough and dry.

2. Pour as much oil from the pan as possible, keeping the pork in the pan. Return the pan to the stove, add the kim chi and stir to mix the pork and kim chi over medium-low heat for about 2 minutes.

3. Add the scallions and drizzle some sesame oil over. Plate up and serve with hot plain rice.

Sunday, November 20, 2011

Turkey Pie and A Perfect Crust

DSC_8954_509x768
                          Fabulous turkey pie.

MIL's relatives visited from China so I roasted a turkey. It's an early Thanksgiving dinner I suppose. Turkeys are totally uncommon in China and I thought my guests were pretty happy until one of them said, when going out the door, "If I were cooking the bird, I'd add some soy sauce, some chili flakes and just more salt, you know."  I suppose you can, I said.

With the leftover turkey, I made PW's chicken pot pies from her book The Pioneer Woman Cooks because she made them look rustic and not too advanced on the cooking scale. I love pies but the thought of making the crust just puts me off. Turned out that PW's pie crust is not only perfect--short, flaky, delicious--but also perfectly easy to make. There's no way it won't be perfect because there's so much shortening in it, 3 cups flour to 1 1/2 cups shortening. I replaced 1/2 cup of the shortening with butter and the pastry was still good. PW insists on using Crisco and no butter for that perfect flaky pastry. I made a second batch using Crisco only and it was the same as the one with butter but I'll still take PW's advice and use Crisco only because I couldn't tell the difference between the two pastry in terms of flavor. Fat is 9 calorie per gram so I made a large pie without a base (pot pie) so that there's less pastry to eat and then with the leftover filling and pastry, I made little pies that I can freeze.

PW's pie crust is better than that in my chicken and leek pie recipe and my lattice-top apple pie recipe. I think the difference, besides the higher amount of shortening, is that the dough is not kneaded at all. That sort of negates everything about fraisage in my apple pie crust recipe but then again there's water added to that recipe to make the pastry strong enough to weave. PW's pie crust pastry is too short for weaving but is perfect for both savory and sweet pies and tarts.You can see how she makes the crust step by step here.

My son Wey devoured the pie. I thought that it was a little bit too watery and not creamy enough. I also don't like celery in my pies. I'm still searching for that elusive chicken pie recipe that will remind me of the chicken pies I ate at Max's Coffee House (I think that's the name) in Kampung Air in the 70s. Max's was the only western cafe and going to Max was a real treat. The pies at Max's were always served with a bottle of Lingham's sweet chili sauce. Absolutely heavenly.  Have you ever wanted to eat something that reminds you of your childhood and then when you eat it, years or even decades later, it's not as good because your standards are different now? I suspect that probably it's the memory of swimming in the sea in Kampung Air and then eating at Max's when I had extra money that make me crave for them.

In the recipe below, I've increased the amount of chicken/turkey and flour to get a thicker gravy. I don't like celery in my pies so I've replaced that with mushrooms. I also added a bit of garlic and my favorite gravy flavoring, Harveys Bristol Cream Sherry for that oomph.

DSC_8939_1024x678
Add the beaten egg to the crumbly mixture of flour, salt and shortening.

DSC_8941_1024x678
Add the ice-cold water and vinegar, stir to mix well. Finally, do not knead, just gather the dough together into balls.

DSC_8943_1024x678
If you are rolling directly on the work surface, flour it first.

DSC_8949_1024x678
PW's Perfect Pie Crust IS perfect: light, very short and delicious. And super easy to make.

DSC_8973_509x768
You can have the perfect pie recipe but if you burnt the pies...

Chicken/Turkey Pie (makes 2 large 9"/ 23 cm pies or about 30 small muffin-sized ones)
Filling:
3 cups of cooked turkey/chicken, deboned and cut into small bite-sized pieces
1 cup white or Swiss brown mushrooms*, sliced
1 carrot, diced about pea size
1/3 cup plain flour
1 cup frozen peas
1 large yellow onion, chopped
2 to 3 cloves garlic, minced (optional)
1 tsp dried thyme or marjoram or parsley (as you like)
2 cups chicken stock
1/2 chicken buillion/stock cube
1 cup dairy cream
salt & pepper to taste
2 tbsp Bristol Cream sherry
2 tbsp butter

* or 2 stalks of celery, cut pea-sized

1. Melt butter in a large pot over medium heat. Add the onion, garlic, mushrooms/celery, carrots and saute until the veggies turn transparent. Add the peas, then the chicken/turkey and sprinkle the flour over, stirring to combine. Let mixture cook and bubble for two minutes, then add the chicken stock and stock cube. Now add the cream and mix well. Cook over low heat until mixture thickens, about 4 to 5 minutes. Season with the sherry, herb, salt and pepper to taste.

2. Pour the mixture into a pie dish, level.

Perfect Pie Crust (enough for two 9"/23 cm pot pies only)
3 cups plain flour
1 1/2 cups shortening (I used Crisco)
1 large egg
5 tbsp cold water
1 tbsp white vinegar
1 tsp salt

egg wash: 1 yolk + 1/2 tbsp milk or just whisk an egg, half the white removed

note: this recipe will make more than 2 x 9"/23cm pie crusts for pot pies (i.e. no base) but to make 30 small pies, you need 2 times the recipe amount.

1. Put the salt (I add this now to get it evenly mixed in but PW adds it with the vinegar), flour and shortening into a large bowl and use a pastry cutter to cut the shortening in until the mixture is coarse-crumbly.
2. Beat the egg and add to the flour mixture, stirring to blend egg in. Pour the water over and then the vinegar (in a large circle) and use the pastry cutter to mix well. Gather dough together; no need to knead. Chill the pastry for 10 minutes.
3. Divide the pastry into two, roll each between plastic sheets.

Making the large pies:
1. Preheat oven at 200 C.
 2. Scoop filling into two 9"/ cm glass pie dish to the rim. Use a rolling pin to roll the crust larger than the pie dish and transfer the pie crusts onto the pies with the rolling pin. Brush the crust with the egg wash. Make decorative edges, snip a cross in the middle to let steam out. Brush with egg wash and bake 25 to 30 minutes.

Making the small pies:
1. Preheat oven at 200 C.
2. Roll pastry out, cut into circles large enough (I used a large ring cutter) to fit the muffin cups to the rim. Put some baking weights or beans (I used soy beans) on the base of the pastry and bake 10 to 12 minutes.
3. Remove muffin pans from oven, fill the muffin cups with the filling and cover with a circle of pastry. Pinch the edges of the top and bottom pastry together and use the tines of a fork to press a pattern around the edge.
4. Brush egg wash on the tops of the pies, snip a cross with scissors in the center and bake 20 minutes.

Thursday, November 17, 2011

Yi Copying AWW

thought my daughter's post today was interesting so I got her permission to re-post it here. She's working in shanghai and loving it.

NOV 16, 2011

"Wei Wei Who?"

If you've been following the news lately or are working in a creative industry, you cannot NOT know who Ai Weiwei is! He's a total headline grabber - some days I'd walk into the office and my colleagues come up to me even before they say good morning and report to me that Ai Weiwei's in the news. Again.

Weiwei was recently named Artview's most powerful person in the art world and is also in TIME magazine's Top 100 people of 2011, which is why I was really surprised when friends back in Australia only gave a 'huh?' response when I rambled on about his recent issues with the Communist Party of China. And when I accused them for living under a rock, the response was, "Hah...you're becoming too Chinese...who knows what's going on there?!" SIGH! That seems to be what everyone's been telling me when I go on about stuff going on around here!

Now, if you're clueless about who he is, I'll be nice and tell you a bit about him. :)

Weiwei is an artist, photographer and curator, best known for designing the Beijing Olympics Bird's Nest Stadium, a collaboration with Swiss starchitects Herzog and DeMeuron.

One of his most controversial works, "Dropping the Urn", shows photos of Weiwei nonchalantly dropping a priceless Han Dynasty urn. I'm not sure how you'd intepret it, but when asked, Weiwei said he did this on a whim, 'to show how gravity works'. Whoa. An apple would've been cheaper. I can't help but wonder how he was like as a kid. His poor mother!

Another famous piece by Weiwei was his installation in the Tate Museum in London in 2010, 'Sunflower Seeds'.


At first glance it doesn't look like much - but take a closer look and you might notice that these are not actual seeds; they are hand-painted replicas made of porcelain. Weiwei gathered 1,600 people to to individually hand-make one hundred million seeds, to speak about the mass-production, 'Made in China' phenomenon taking place today.

I was inspired last weekend to do a portrait of Weiwei. Initially the idea was to just do a small A4 sized portrait of him but then I thought I'd bring my materials out to the little lanes of my longtang, and do a portrait of him in public...what an attention-seeker, huh? But Ai Weiwei does that too! Oh, guess what medium I used? No, not paint - that's so BOH-RING...! I collected 100,000/7kgs of sunflower seeds, and this is what I did:

My curious neighbours came over to check out what I was up to!

...and more curious people gathered around! Eventually, someone said, 'Hey! That's that Beijing artist...Ai Weiwei!' WHEW! At least someone could tell!


Wednesday, November 16, 2011

Durian Tang Yuan

DSC_8919_1024x678
    Durian mochi/tang yuan--sooner or later someone will come up with this or maybe someone already has but this is my version.

I had a bit of leftover durian flesh and had no idea what to do with it. Then I saw a copy of Silkroad, the Dragonair inflight magazine that Yo had brought for me. The latest issue featured Hong Kong dessert houses and the new desserts, the most unusual one being a bitter gourd sherbet. Now that's a dessert I can't wait to try next time. It must be quite an eating experience!

Instead of red bean or sesame paste, I filled my tang yuan (glutinous rice balls) with the lefttover mashed durian flesh, sprinkled some dessicated coconut (fresh shaved coconut would've been perfect but I was too lazy to run out for that) over and drizzled a light gula melaka (palm sugar, the best-tasting sugar in the world) syrup over. I served the tang yuan warm because tang yuen hardens when chilled.

The durian-filled tang yuan, covered with sweet coconut flakes and gula melaka, was stunning. I hope this has not already been done before because I'm patenting this for my dessert house! I'm kidding but I think if I have a dessert house, this item will be a huge hit. If there's one thing I've gained from the Jelliriffic! Challenge, it's the obsession in creating new recipes. The mushy durian is a little bit tricky to handle but you can half-freeze it. You must make this.

DSC_8927_1024x678
    How good can durian get? This good.

Durian Tang Yuan (makes 7 to 8 balls)
3/4 cup finest, freshest glutinous rice flour
1/4 cup room temp water
1/4 cup durian flesh, mashed with a fork and hard clumps removed & half-frozen
Topping: fresh or desiccated coconut shavings
              light gula melaka syrup*

* if not available, any other sugar syrup

1. Mix the flour with the water until the dough comes together. You may have to add more flour or water. Divide into 7 or 8 small portions.
2. Dust your palms, roll one portion of dough into a smooth ball, then press it into a flat circle (not too thin or the durian will seep through) and put a teaspoon of durian flesh inside. Pinch the edges together to seal and roll again into a smooth ball. Repeat until all the dough is done. Place tang yuan into fridge to firm up, about 15 minutes.
3. Bring a pot of water to boil. Take the tang yuan out from the fridge. Dust your hands again with glu rice flour, roll the tang yuan between your palms until round and smooth and drop them into the boiling water. Immediately use a pair of chopsticks or slotted spoon to move the balls so that they don't stick to the bottom of the pot. Turn the heat to medium. When the balls rise, they are done. I like to switch the fire off, cover the pot and wait a couple of minutes.
4. Scoop the balls out with a slotted spoon onto a bowl. Sprinkle coconut shavings over and drizzle with sugar syrup.

Monday, November 14, 2011

Durian Pillows

DSC_8898_1024x678
Durian pillows.

DSC_8908_1024x678
My pancakes were too thick. I like the durian flesh and cream separated although taste-wise it doesn't matter. The filling was mushy because the pillows were not chilled before the photo session.

DSC_8913_1024x678

DSC_8914_1024x678
Store-bought durian pillows were thin-skin and small enough for only one mouthful or two dainty bites.

Hub and I were at a dinner last Saturday and the host served durian and mango 'pillows', thin crepes stuffed with durian or mango and cream, folded into the shape of a puffy rectangle pillow. The dainty durian pillows cost RM8.90 for 3 (RM5.90 for mango pillows) and were so small that one of them can fit nicely into a Chinese soup spoon. The cream and durian were blended together, a clever way of scrimping on the durian. Durian is so strongly flavored that a little bit of it can jazz up a large amount of cream. In Hong Kong and Peninsular Malaysia, the cream and durian are in distinct layers of about 50:50.

I found the recipe for the pancakes here and was happy with it because the pancakes turned out very smooth. However, my pancakes were three times as thick as the store-bought ones, which was why the corners of my pillows broke and also why I couldn't get the pillows to look puffy without making them the size of an egg. I took one of the store-bought pillows apart and found that each pancake was half a pancake. Maybe the trick to getting a very thin pancake is to pour the batter into a cool non-stick pan, swirl the batter so that it spreads out thinly and then put it over a low fire and cut each pancake into half.  I'll do that next time.

I thought I'd like the 50:50 ratio of durian to cream but found that the pillows taste smoother and better if there's more cream. The best durian for this is kampung (village) durian because they simply taste better. Also, I find that some of the new hybrids have a strong raw onion flavor. I used coconut milk as per the recipe but I've changed that to fresh milk in the recipe because I found that coconut milk messes up the durian flavor. The store-bought pillows didn't have any coconut flavor. With the replacement of rich coconut milk by the fresh milk, a bit of melted butter will keep the pancakes softer and tastier.I used organic eggs to give the pancakes a bit of color.

This dessert is simple and quick to make and you'll get plenty of "ooohhhs" and "yummms" especially when the pillows are served very chilled, with a good coffee. Allow at least 4 a person; the pillows are really that good.

DSC_8892_1024x678
For making durian cakes and desserts, boxed durian will work out a lot cheaper. Get them late at night when the vendors slash their prices.

DSC_8894_1024x678

Durian Pillows (makes 16 x 12 cm diameter or 8 to 9 large ones)
The Pancakes:
160 gm plain flour (some recipes use Hong Kong flour)
350 ml fresh milk (coconut milk will tone down the durian flavor)
1/2 Tbsp butter, melted and cooled
pinch of salt
2 organic eggs*

*as advised by Zurin, an extra yolk will make the pancakes softer and easier to fold.

1. Mix the pancake ingredients together. Pour batter over a sieve into a bowl to get a fine and smooth batter.

2. Lightly grease a non-stick frying pan with melted butter and pour in a small ladle (you'll have to find which size is best; try making a large pancake and cut that into half) of batter and swirl the batter around to get a very thin pancake. Cook over a low fire until the pancake is done. It takes less than 30 seconds. No need to turn over but if you do, turn over for two to three seconds only. Repeat until all the batter is done. Cool. If like, you can grease the frying pan before every ladle of batter is poured.

note: as advised by Sonia, to get thin pancakes, pour more than enough batter into the frying pan, swirl the batter to cover the whole pan and then pour the extra batter back into the bowl of batter.

Filling:
300 gm fresh dairy cream (estimated)
1 tbsp caster sugar (to taste)
2 cups durian flesh* (estimated)

* or pieces of mango or other soft, flavorful fruits

1. Whip the cream with the sugar until stiff. Chill
2. You can blend the durian flesh or mash it with a fork. I think I prefer to mash with a fork because the blended durian was too mushy and the fibers were all cut up.
3. You can mix the cream with the durian or leave separate.

To assemble:
Put a heaped tablespoon of whipped cream onto the center of the pancake (smooth/unfried side facing plate), top with a level half tablespoon of durian flesh, and fold into a small, puffed rectangular pillow. If you have mixed the cream and durian, just plop a large tablespoon onto the middle of the pancake and fold. Chill very well before serving.

Friday, November 11, 2011

Winner Of Olympus Camera!

My Internet connection was restored by re-wiring the Internet and phone lines but the IP number was changed by the previous technician that I had engaged so the line was connected to the phone instead, which means I didn't have wi-fi service. The technician came tonight and hooked up the IP thing and all's well now. I am just thankful that the Internet disruption happened around Day 20 of the Jelliriffic! Challenge. I very nearly went crazy running between my Hub's office and home some nights, trying to post before midnight.

I thought of getting my son Wey to draw the number for the lucky winner of the Olympus  camera but he and I are upset with each other. He's writing his SPM next Monday. Anyway. Today's a special date, 11.11.11, so I thought that I'll give the camera to the person who made the 111th comment. As I scrolled down the comments, I could see a friend from Melbourne, a reader who makes regular comments, another blogger in the Jelliriffic! Challenge--all people to whom I wish I could give a camera! Comment No. 110 was from someone I know (my daughter!) and the winner would've been her if a comment before that was not deleted by the writer. Comment No. 112 was from a friend with whom I car pool.  So guess who the 111th comment writer is? I'm so happy for her!

Zurin said...

Hey I missed this! I LOVE LOVE LOVE the colours and the idea behind it :))))) youre really on a roll :P

October 6, 2011 12:58 PM 

Related Posts Plugin for WordPress, Blogger...